 Difficulty: Very Easy
Tactical Sense Requirement (approx.):
- Minimum: 300
- Half-shield: 500
- Broken-shield: 700
Bosses:
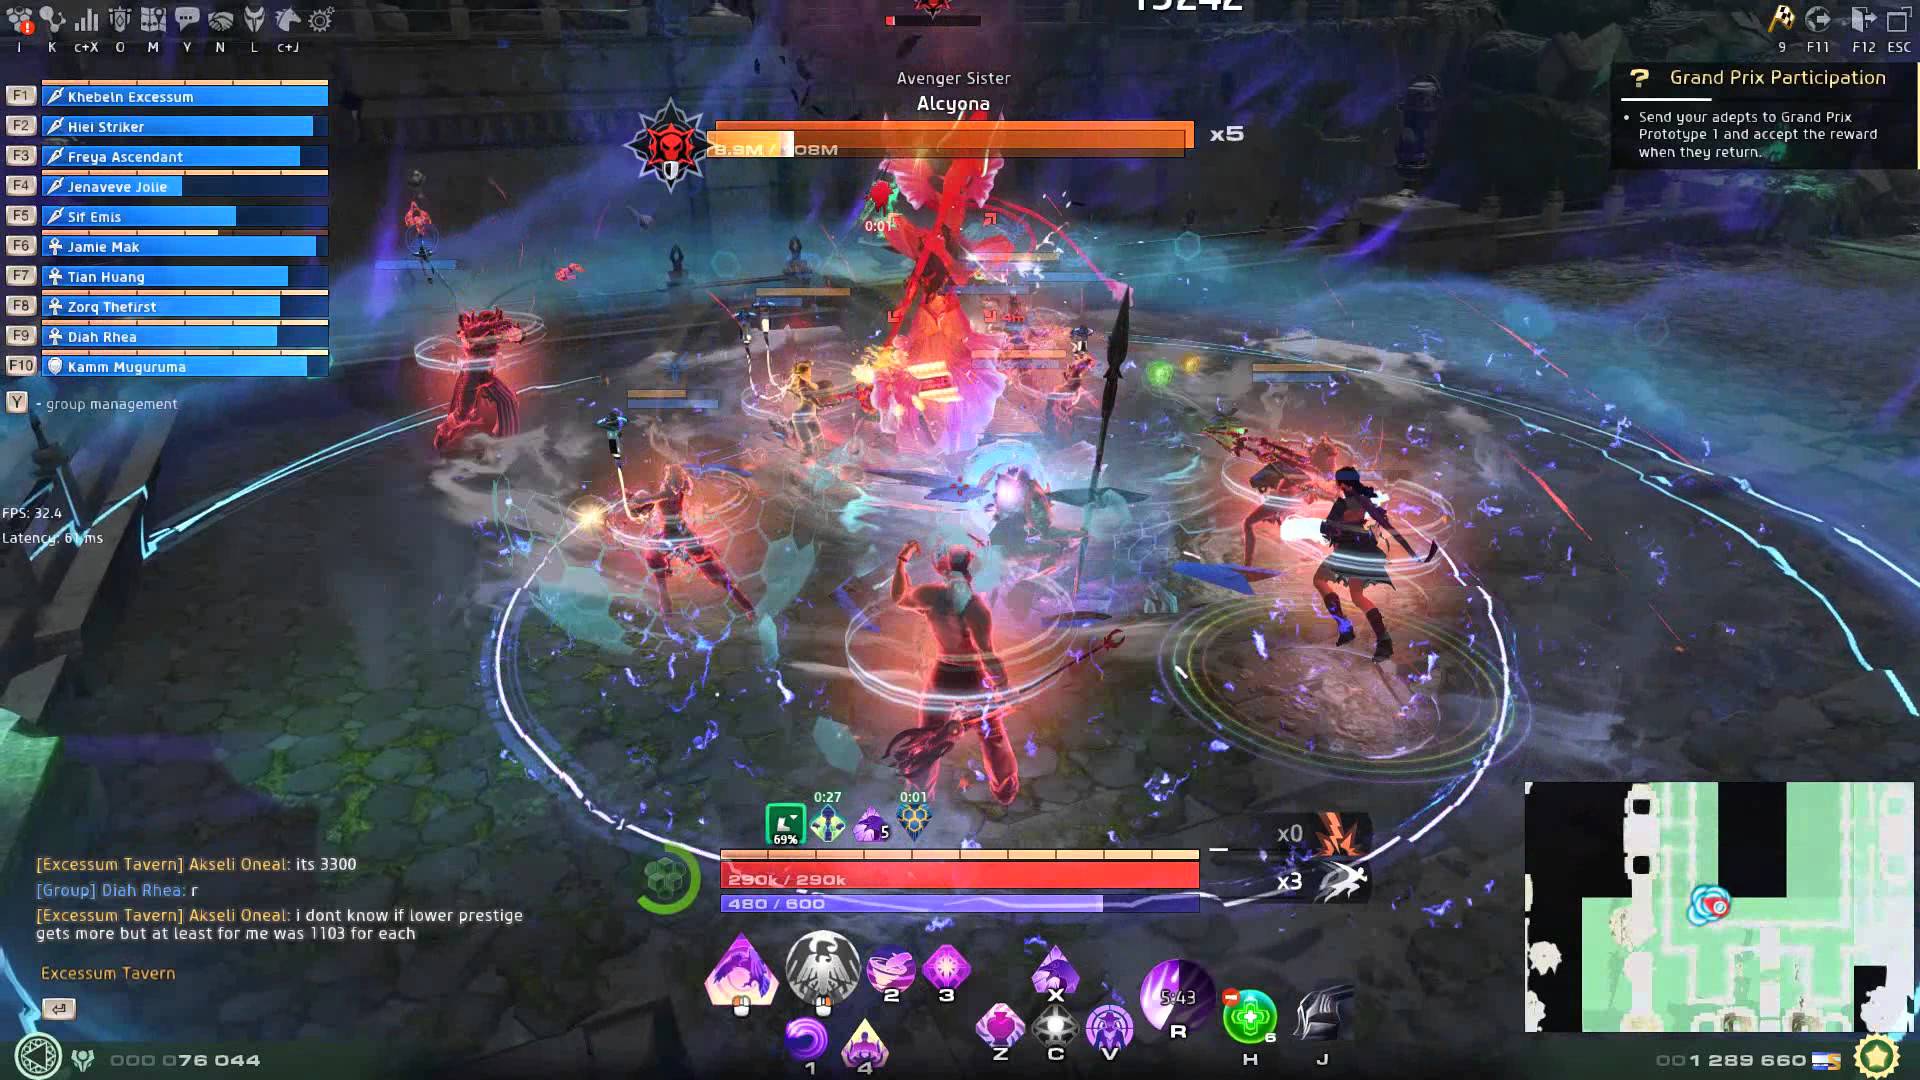
- Alcyona (108m, 50 bars)

- Melia (108m, 50 Bars)

Preferred composition:
- 3 Tank
- 3 Damage
- 3 Alchemist
- 1 Fill (We suggest a LightBinder for the first couple runs)
Summary:
This fight is very easy with the three tank method that we use. With the rotations of stronghold and tantrum, if done correctly you and your party will take a minimal amount of damage and will maximize survivability when your damage dealers are low stamina and don’t have much damage. This fight is a simple way of getting you normalized with long fights and simple mechanics.
Tips and Tricks:
These bosses don’t have an aggro table so they will randomly target one player and hit them with 150k+ hits each. They both target the same person so it is very easy for any damage dealers to get “one-shot” if their health is even a little bit low. Once Alcyona dies Melia will get a soft enrage that makes her hit twice as hard, so it doesn’t get easier once one boss is down.
Once the first boss dies the person who got the last hit on the boss will get to turn into god form and begin doing a massive amount of damage.We suggest once the first boss gets down to half a bar you have all supports and tanks stop their DPS. Also any DOTs can trigger this so if you want a kinetic to get the god form make sure to have him save his sledgehammer and buffs for the last bar.
After you have killed the first boss you will have to rush over to the second boss. In the middle of this map it is a lot of geysers. Make sure you dodge them as they will easily take out 1/3 of your health and knock you across the map and possibly into another geyser. This is where the LightBinder makes their presence known (see LightBinder roles and responsibilities). We recommend a LightBinder for your first couple runs for the ultimate when running from one boss to another.
Once you are comfortable with clearing it affectively you can get rid of the LightBinder and replace them with another damage dealer to speed up any DPS. Once you get better gear and the correct gear you will be able to clear A1 sub 10 minutes.
NOTE: This distortion has been known to glitch and not produce rewards if completed too quickly (ex. < 5 mins).
Roles and Responsibilities:
- Knight’s:
- As a tank is is up to you to keep your damage dealers and supports alive. This is where you show your leaders why you deserve to be the main tank within your pantheon. Your most important skills to have equipped will be stronghold and tantrum. Stronghold will negate 80% of incoming damage to you and your allies for as long as the button is held. Rotating Stronghold is the main way of making sure your party doesn’t take 300k+ of damage in 2 seconds. Tantrum on it’s own is nothing more than a bonus for you, but when coupled with the talent “Battlemaster” it blocks 20% of incoming damage for you and your allies as well as giving them a 20% movement speed increase.
- Rotate Stronghold and Tantrum between the three of you so Stronghold and Tantrum are always up. If your party members have LightBinder symbol they will take no damage if done correctly.
- The big question you might have is where do I tank these bosses? That answer is easy, you don’t. These bosses don’t have an aggro table so you can’t taunt them off your allies, this is why Stronghold and Tantrum are so important. You will tank them with your back to the other boss accordingly.
- NOTE: There will be a second or 2 downtime on Stronghold between the third and first person’s rotations. Also if you take 33% of your maximum health while in Stronghold it will get interrupted, so be paying attention when it is your turn.
- Damage:
- Your role in this is very simple, hit the boss with all you have as fast and as often as you can. Make sure you are coordinating with your alchemist’s as to when their injections and spray are up and let them know when your rotation is ready. If you have a witch on the team make sure you can break the shield and continue to do damage after the shield is broken otherwise a not broken shield is wasted time and DPS.
- Your positioning in this fight is not very important. Make sure you are inside the Knights Stronghold for the damage reduction. Other than that we found that the easiest way to make sure you are all together for an Alchemist ultimate is to be facing the boss across from you in the corner.
- Once you get the first boss down, make sure you are letting your highest damage dealer get the last hit otherwise it is a long fight when it comes to the second boss.
- Alchemist’s:
- You have a bit of a different role in this fight. Your job is to not worry about the tanks since they can handle themselves. Your job is to focus on the damage dealers. We recommend you each pick someone to buff and communicate with them when their rotations are ready and when your injections and spray are ready.
- Pick one Alchemist to place terminal once cooldown is up. This will prevent anyone from taking damage if they happen to get hit.
- When the first boss is killed have one person place a terminal down so when you are running through the middle if you get hit by a geyser you won’t take any damage.
- If you notice that most of your party is low on health call for an ultimate. Make sure you communicate with the other Alchemists on your ultimate as there is a debuff put onto anyone who already got healed by one in the last 8 minutes.
- LightBinder:
- You are very crucial in the first 10-15 runs of this until your group decides that they want to make it harder on themselves and add a damage dealer to replace you. Make sure you have a damage class when this does happens.
- Until that happens you are the one that will save everyone when they go rushing out and get killed by the geysers (it will happen). Your job is to make it so people live. To do this you will have to make sure you are focused on all the communication going on in the call. We recommend the LightBinder be the one to call the shields and to tell people where the health orbs are and who should get them since your job as a LightBinder isn’t very demanding.
- When it comes to abilities make sure you have Halo on since it reduces incoming damage by 50% (up to 80% with epic weapon) use Halo on cooldown. Blessing of Tenacity is a useful skill to have also but if you notice a lot of people are dying trade it in for Rise and Shine as it is another rez for your team. Coordinate your damage buffs and Flood of Light (holding left mouse button) with the highest damage dealer in your group. If you notice someone is low on health focus your shields on that person until they get a health orb.
- Once the first boss dies you want to pop your immunity to help with people trying to cross the geysers. After you have used that you should use your ultimate to protect anyone who dies while trying to get to the other boss.
Recommended Gear Stats:
- Knight
- Main-Hand: Tantrum buff duration increase
- Off-Hand: Barrier II buff increase
- Kinetic
- Main-Hand: Sledgehammer bonus damage
- Off-Hand: Ultimate cooldown reduction
- Berserker
- Main-Hand: Fracture damage increase
- Off-Hand: Battlefrenzy or Whirlwind
- LightBinder
- Main-Hand: Damage buff increase duration
- Off-Hand: Halo damage reduction
- Alchemist
- Main-Hand: Stimulant cooldown reduction
- Off-Hand: Terminal cooldown reduction
Skills and Talents: The recommended/required builds for each class.
NOTE: Only the recommended class are shown.
~~~~~~~~~~~~~~~~~~~~~~~~~~~~~~~~~~~~~~~~~~~~~~~~~~~~~~~~~~~~~~~~~~~~~~~~~~~~~~~~~~~~~~~~~~
Knight

aa
~~~~~~~~~~~~~~~~~~~~~~~~~~~~~~~~~~~~~~~~~~~~~~~~~~~~~~~~~~~~~~~~~~~~~~~~~~~~~~~~~~~~~~~~~~
Kinetic

aa
~~~~~~~~~~~~~~~~~~~~~~~~~~~~~~~~~~~~~~~~~~~~~~~~~~~~~~~~~~~~~~~~~~~~~~~~~~~~~~~~~~~~~~~~~~
Berserker

~~~~~~~~~~~~~~~~~~~~~~~~~~~~~~~~~~~~~~~~~~~~~~~~~~~~~~~~~~~~~~~~~~~~~~~~~~~~~~~~~~~~~~~~~~
LightBinder

NOTE: Can replace Blessing of Tenacity for Rise and Shine if a lot of people are dying.
~~~~~~~~~~~~~~~~~~~~~~~~~~~~~~~~~~~~~~~~~~~~~~~~~~~~~~~~~~~~~~~~~~~~~~~~~~~~~~~~~~~~~~~~~~
Alchemist

~~~~~~~~~~~~~~~~~~~~~~~~~~~~~~~~~~~~~~~~~~~~~~~~~~~~~~~~~~~~~~~~~~~~~~~~~~~~~~~~~~~~~~~~~~
Map:

Rewards:
All distortions upon completion will give Main and Off-hand epic quality gear.
Proficiency:
- Low: 4692
- High: 5109
Prestige:
- Low: 3015
- High: 3207